
Above Ground Pool Base Preparation – Tips and Tricks
Before you dive into the joy of owning an above-ground pool, it’s essential to get the foundation right. Proper above ground pool base preparation ensures the structural integrity of your pool, prevents uneven settling, and maximizes its lifespan. In this comprehensive guide, we’ll walk you through the crucial steps for preparing the ideal base for your above-ground pool.
Step 1: Choosing the Right Location
Selecting the right spot for your above-ground pool is the first and most crucial step in the base preparation process. Consider these factors:
Location Considerations
- Level Ground: Ensure the chosen area is as level as possible. Even a slight slope can lead to structural problems and water imbalance.
- Sunlight: Opt for a location that receives ample sunlight. This helps warm the water naturally and reduces maintenance costs.
- Accessibility: Make sure it’s easily accessible, both for swimmers and maintenance tasks.
- Safety: Keep the pool away from overhead obstacles like trees or utility lines, and consider fencing for safety.
Step 2: Clearing and Excavating
After selecting the location, the next step is clearing and excavation:
Clearing Debris
- Clear the area of any debris, rocks, or roots that could affect the pool’s base.
- Excavate the ground if necessary to create a level surface.
Step 3: Creating a Level Base
The key to a stable above-ground pool is a level base. Here’s how to achieve it:
Level Base Creation
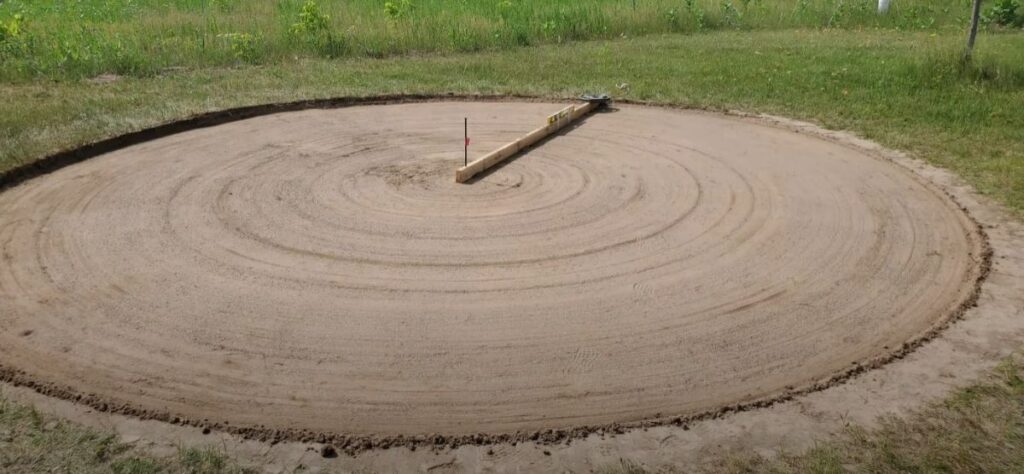
- Use a long, straight board with a hole drilled in the end of it
- Pound a fencing spike through it and into the center of your pool location
- Tape a level to the top of the board check for evenness.
- Tie a rope to the end of the board and drag it in circles.
- Add or remove soil as needed to create a level surface.
- Compact the soil by adding a weight to the board or tamping it down to prevent settling.

Step 4: Adding Base Materials
Now, it’s time to add the materials that will provide a solid base for your pool:
Types of Base Materials
- Sand Base: Many pool owners use a layer of sand as a cushion. Spread a layer of masonry sand or pool sand evenly over the compacted soil. Aim for a thickness of about 2 inches.
- Foam Padding: Some pool owners opt for foam padding, which is placed directly on the ground or over the sand. It offers added protection against unevenness and feels comfortable underfoot.
Step 5: Final Checks and Compaction
Before installing your pool, make these final checks and ensure the base is adequately compacted:
Finalizing the Base
- Use a roller or tamper to compact the sand or foam padding.
- Recheck for levelness using the straight board and level.
- Ensure there are no sharp objects or debris under the base materials that could puncture the pool liner.
Step 6: Above Ground Pool Base Preparation
With the base properly prepared, you can now proceed with installing your above-ground pool!
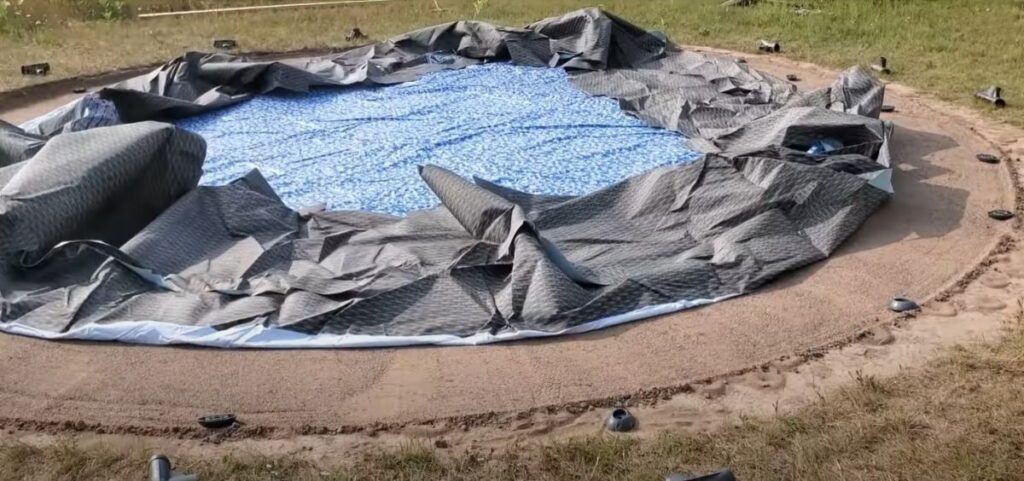
Above Ground Pool Setup
- Follow the manufacturer’s instructions for assembling the pool frame and installing the liner.
- Ensure the liner is wrinkle-free and properly seated in the pool frame.
Tips and Tricks:
- To improve ground stability and minimize future settling, you can install a ground cloth or geotextile fabric under the sand or foam padding.
- Consider using a pool cove around the inside perimeter of your pool to protect the liner and make cleaning easier.
Proper base preparation is the foundation of a long-lasting, trouble-free above-ground pool. By choosing the right location, creating a level base, and following these steps, you can ensure that your pool is not only beautiful but also safe and structurally sound. Enjoy your above-ground pool for many seasons to come!


